

NOTE: The information in the article is old, outdated and has been left here for historical purposes only. Please see our new Building Cross-Platform Universal Frameworks using Swift & the Swift Package Manager article for up-to-date information.
This first part of our three part article on creating Universal Frameworks covers the steps Appracatappra uses to create Universal Framework projects in Swift that will support iOS, tvOS, watchOS and macOS, all while sharing as much common code as possible.
There are several ways to achieve this goal with Swift in Xcode and there have been many articles already written on this subject. So, why am I creating another? I have two main reasons:
- Since we are creating frameworks meant to be sold (or released for free) to 3rd party developers, I’ve made many tweaks to the process to support this. These include building a trial and release version of the framework, creating an install package and creating full API documentation.
- Currently, there are quite a few steps and I wanted to document them so I didn’t forget.
That said, I’d like to stress this point again; mine is not the only way to achieve this goal and it might not be the best way but, it works for me. Hopefully, you can find my modifications useful as well.
This article contains the following sections:
- Building Cross-Platform Universal Frameworks using Swift
- Creating the Universal Framework Project
- Adding Code and Sharing it Cross-Platform
- Packaging the Universal Framework
- Up Next
I found much of the information for this article scattered throughout the internet, so another point of this article is to pull it all together in one place. I’ll give credit and link back to the original source articles, so you can look at different ways of structuring your projects to fit your own needs.
A Word on ABI Stability
Before we continue on, I need to bring up the topic of Swift ABI stability and why it is important when you are creating a framework in Swift.
First, what is ABI Stability? ABI stands for Application Binary Interface and, just like an API does for source code, it provides the protocol that allows code written is Swift to call pre-compiled libraries. As of this writing, Swift 4 has not reached ABI Stability, so a precompiled framework written in Swift 4 can only be used by an app written in Swift 4.
Swift 5 (which is planned to be released later this year) has the goal of achieving ABI Stability. Until then, the app and the precompiled framework must be a matched set as far as which version of Swift they are written and compiled in.
Why Build A Framework?
Given the state of ABI Stability and Swift 4, why would you want to build a framework in the first place? One reason is if you plan on selling or releasing the framework to 3rd party developers without exposing the source (like we do). Another is to share common code across app projects while maintaining one copy. Yet another is to hide sensitive processes from in-house developers while allowing them access.
There are many, valid reasons and, as long as you remember to match the app and the framework Swift versions, the current process works quite well.
Creating the Universal Framework Project
Since the goal is to create different versions of the framework that support all of Apple’s OSes (or as many as your project requires), runs on both the simulators and real hardware and shares as much code as possible, we will be creating one project with several targets in Xcode.
For the sake of this example, we will create the LogJam library that writes the given message to the output inspector log in Xcode and supports iOS, tvOS and macOS.
This section is based off of the information from TofPlay/SwiftCrossPlatformFramework, Xcode & cross-platform frameworks and How to make a Swift framework?.
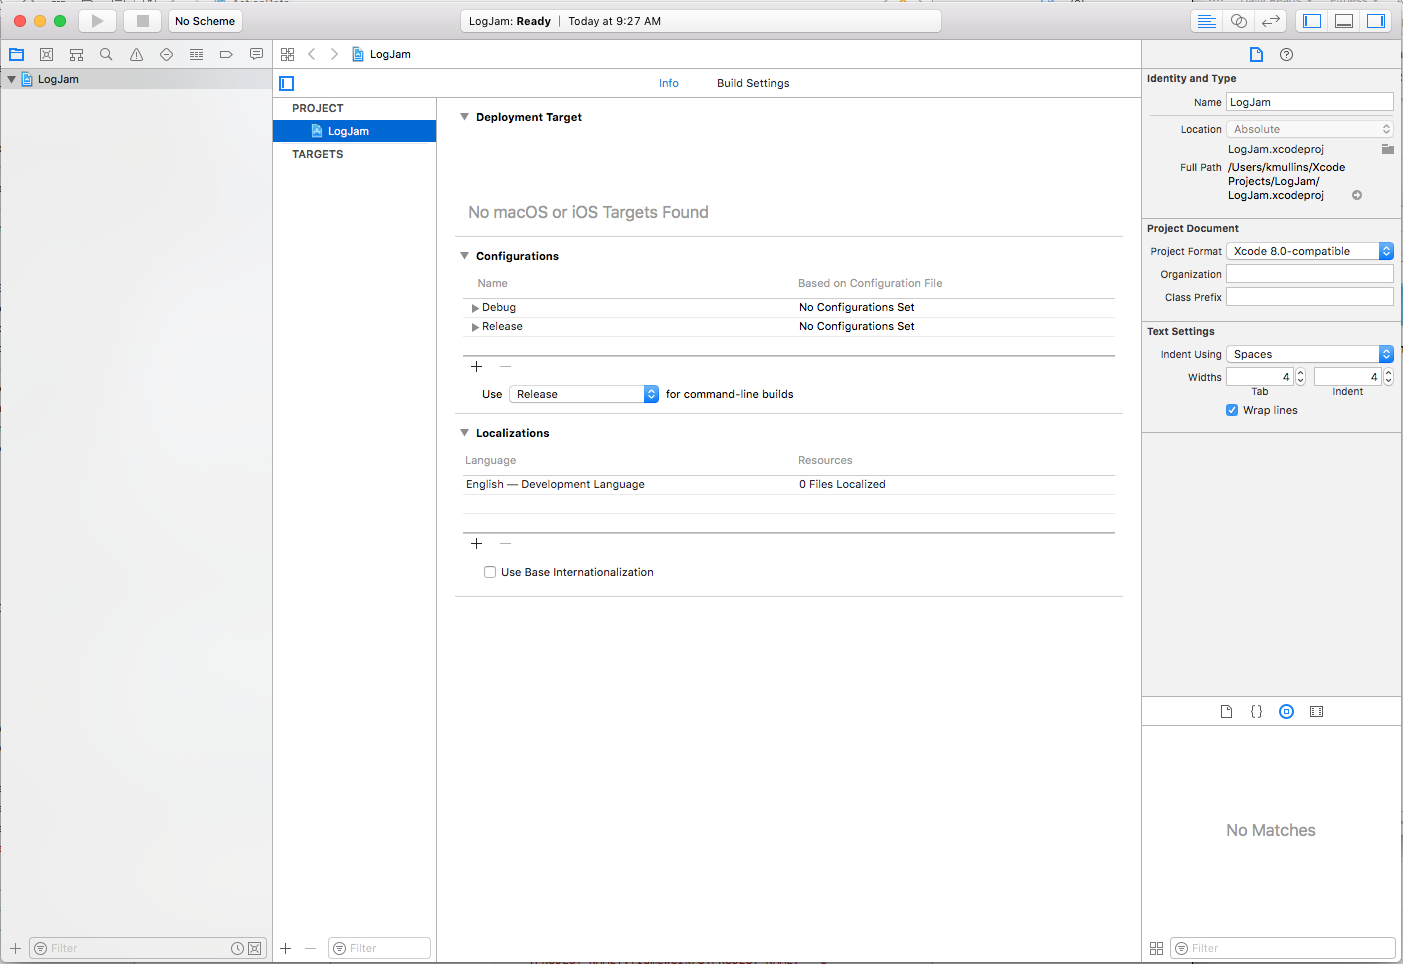
Creating the Main Project
Start Xcode, and select File > New > Project… Next, select Cross-platform and Empty:

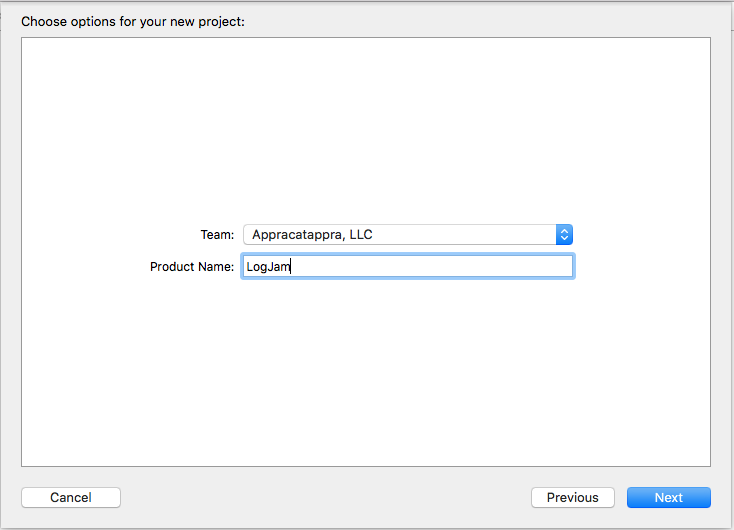
Click the Next button, provide a Project Name, click Next again and select a location to save the project:
Adding an iOS Target
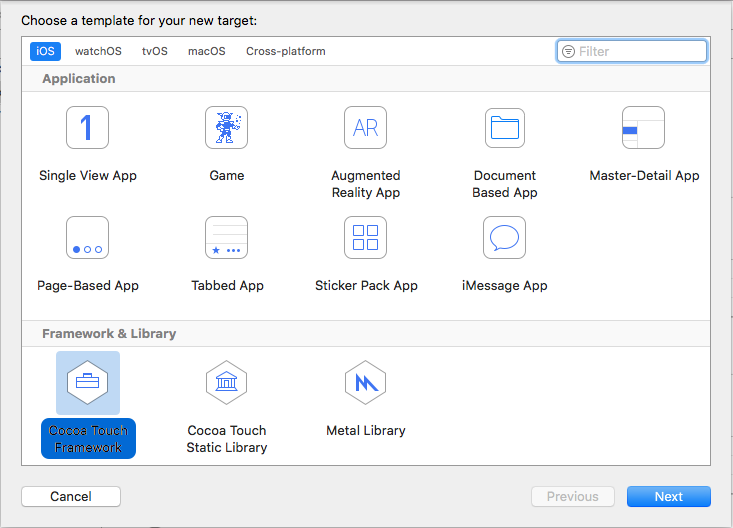
With the main project created, next we need to add the targets for all of the Apple OSes that we want to support with the framework. We will end up repeating these steps for each OS. With the project selected in the Project Navigator, click the + button at the bottom of the Project and Targets list:
Choose iOS > Cocoa Touch Framework and click Next:
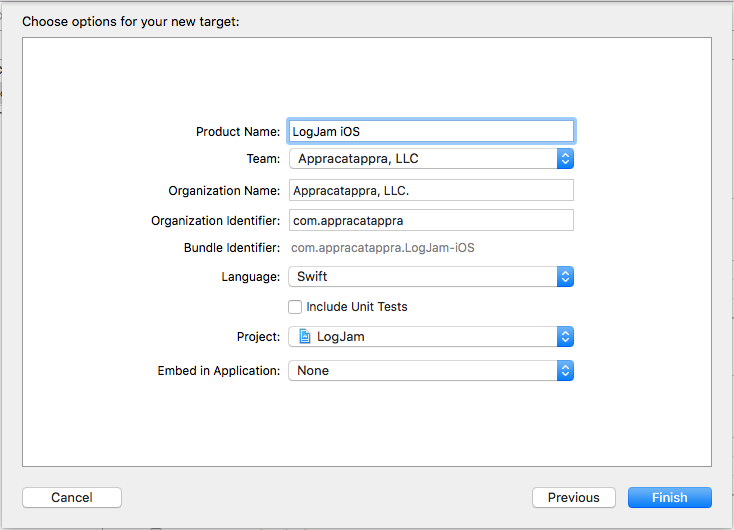
Use the same name as the main project but append iOS and click the Finish button:
Next, remove _iOS from the Bundle Identifier:

If we left things at this point, the framework that would be created would be called LogJam_iOS.framework and the namespace that would need to import would be LogJam_iOS, for example:
import Foundation
import LogJam_iOS
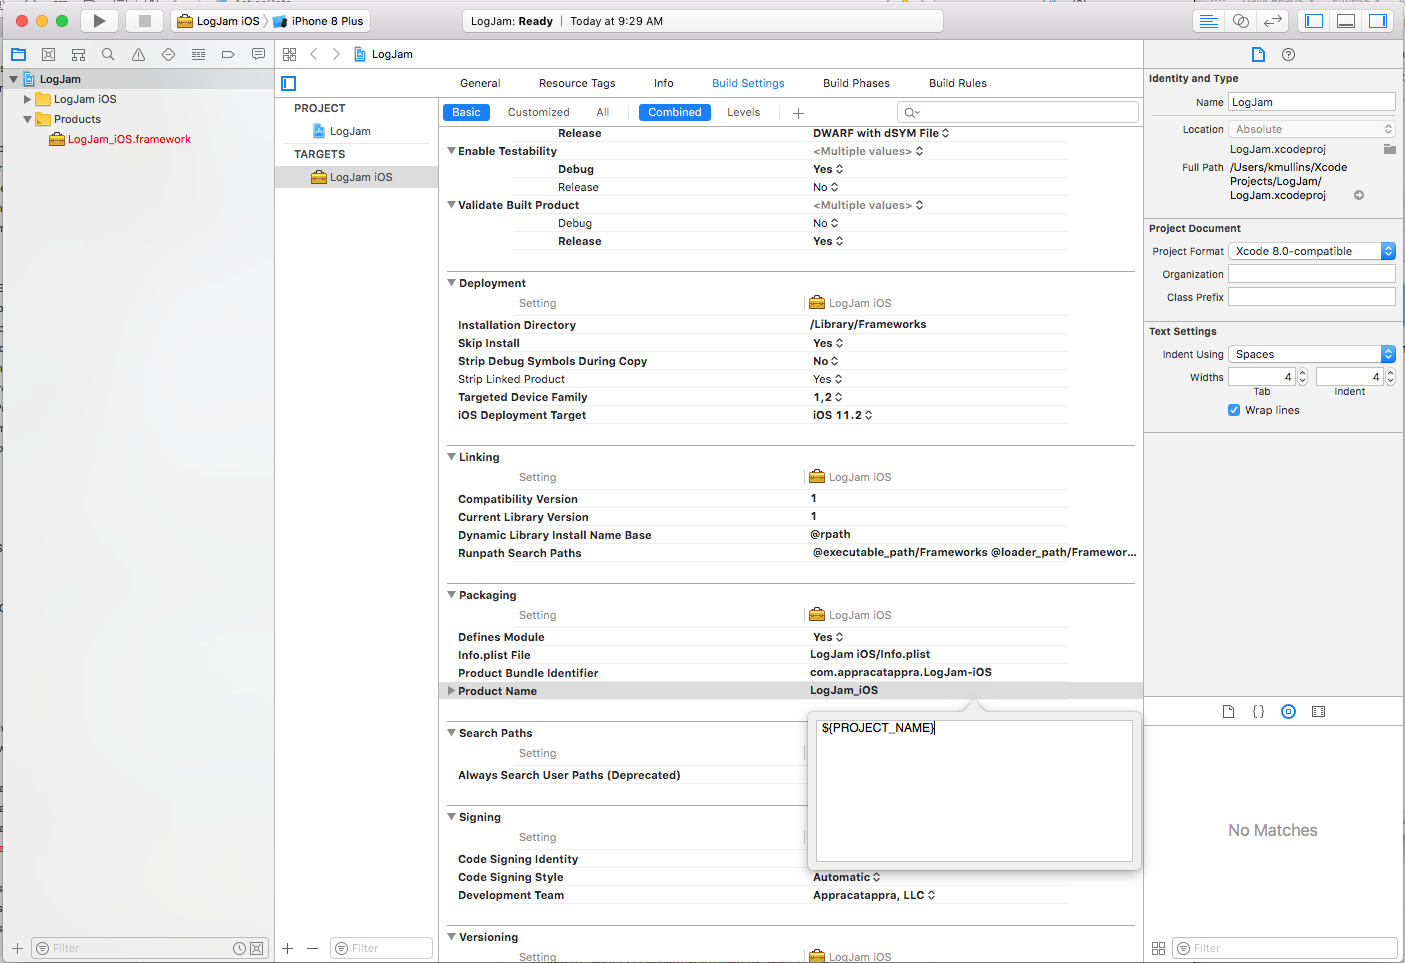
...Which is not what we had in mind for a cross-platform framework. To fix this issue, select the Build Settings tab, scroll down to the Packaging section and double-click the Project Name setting and change it to ${PROJECT_NAME}:
With this done the LogJam iOS target will compile a LogJam.framework and use the LogJam namespace.
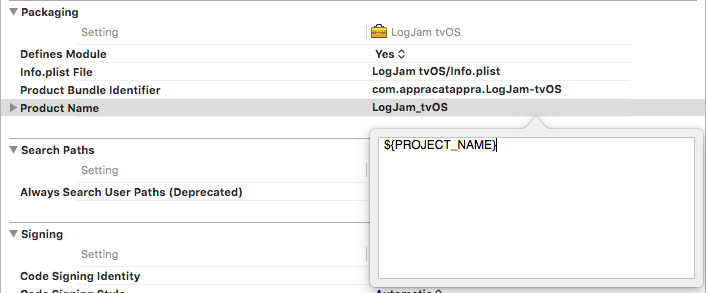
Adding a tvOS Target
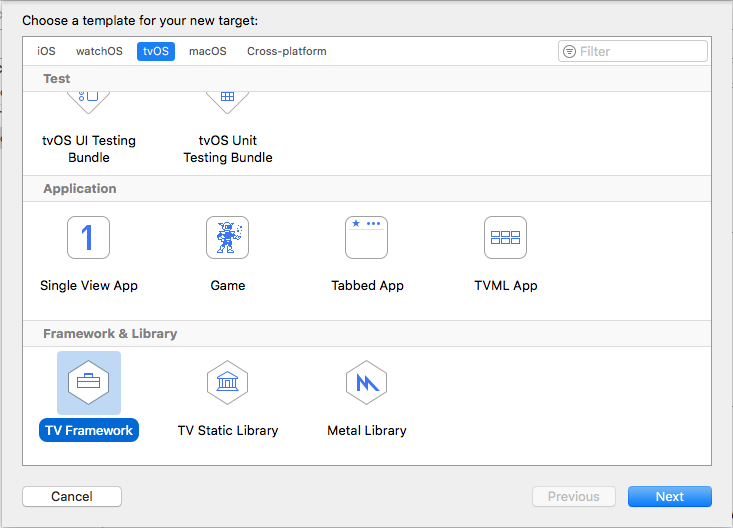
At this stage, we will basically repeat the steps above to add a tvOS version. Add a new Target, choose tvOS > TV Framework and click Next:
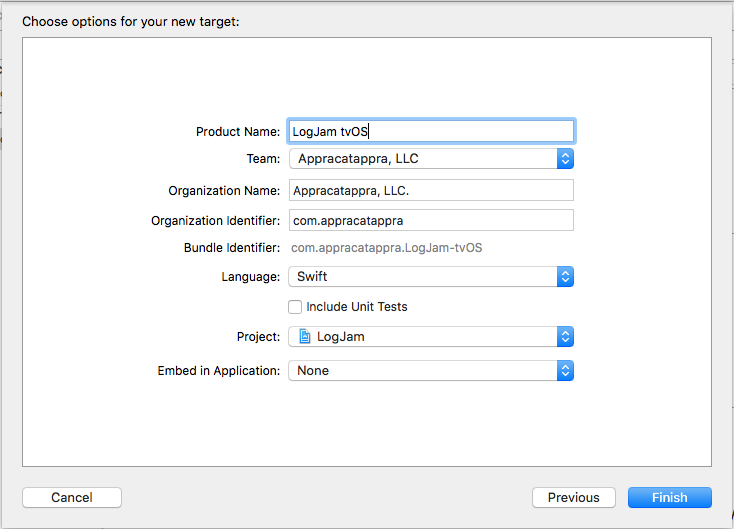
Use the same name as the main project but append tvOS and click the Finish button:
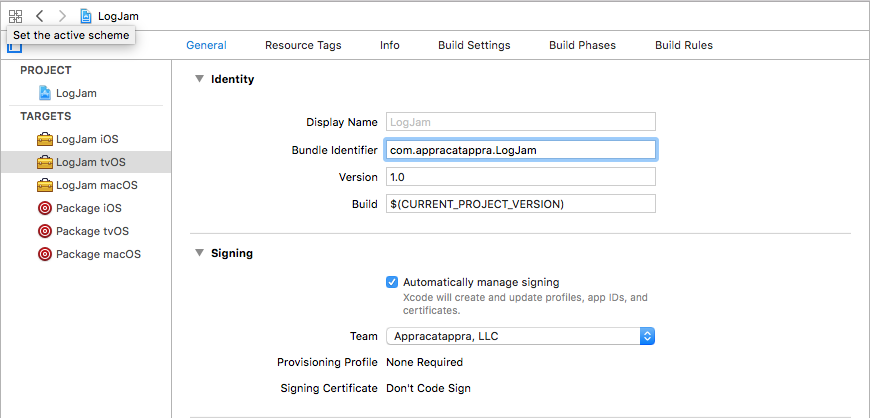
Next, remove _tvOS from the Bundle Identifier:
Select the Build Settings tab, scroll down to the Packaging section and double-click the Project Name setting and change it to ${PROJECT_NAME}:
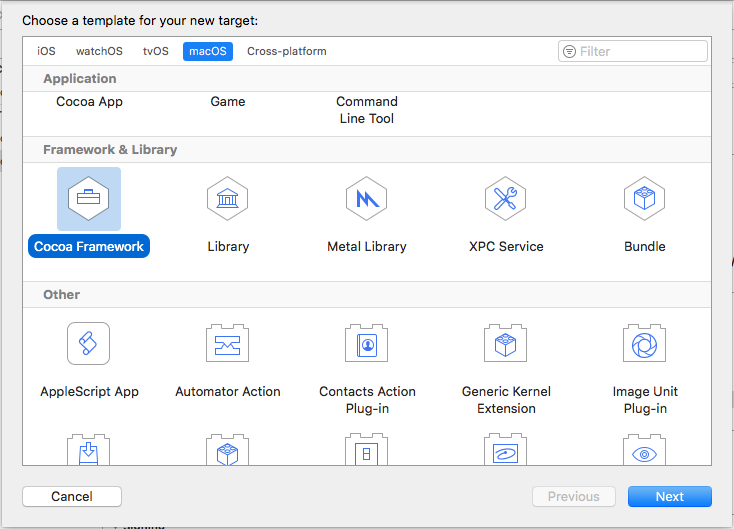
Adding a macOS Target
Repeat the steps again to add the macOS Target. Add a new Target, choose macOS > Cocoa Framework and click Next:
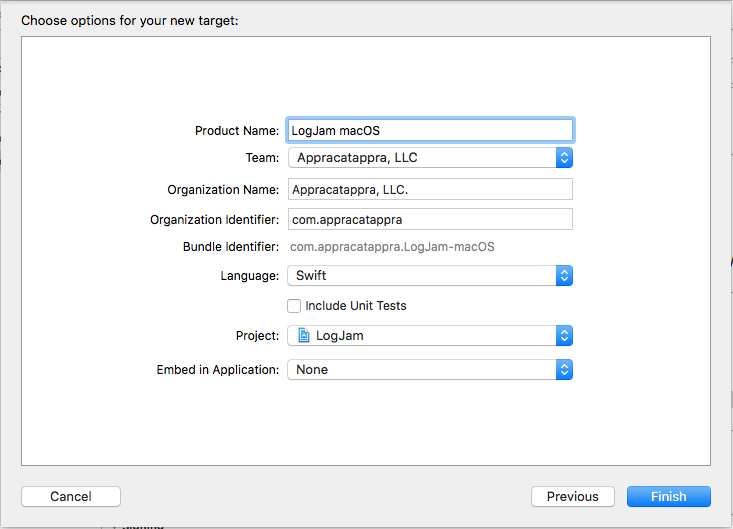
Use the same name as the main project but append macOS and click the Finish button:
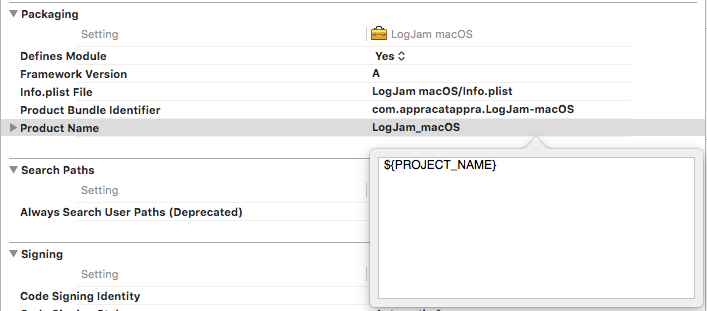
Next, remove _macOS from the Bundle Identifier:

Select the Build Settings tab, scroll down to the Packaging section and double-click the Project Name setting and change it to ${PROJECT_NAME}:
Adding Code and Sharing it Cross-Platform
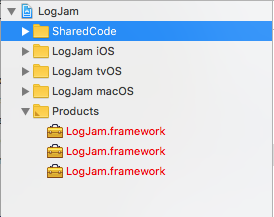
One of the main goals of this exercise is to share as much of the code as possible across the different OS versions of the framework. Let’s add a folder to the project to hold all of the shared code. Right-click on the project name in the Project Navigator and select New Group, enter the name SharedCode:
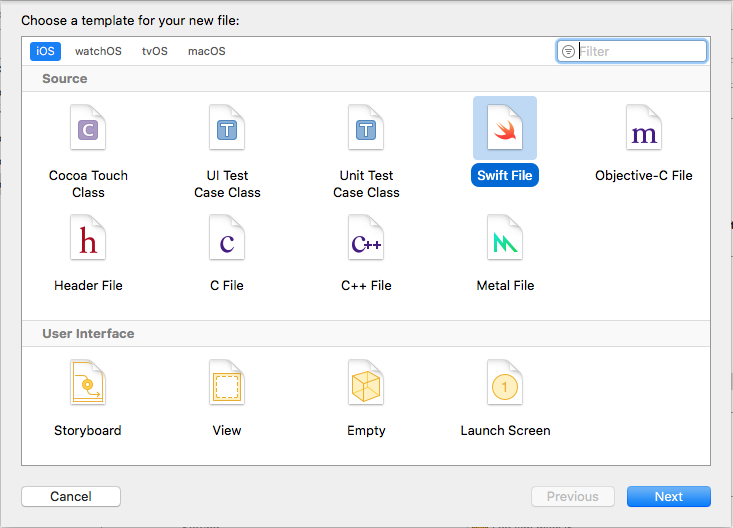
For our example framework, lets add a single class that will be shared across all platforms to handle writing to the log file. Right-click on the SharedCode folder and select New File… > iOS > Swift File:
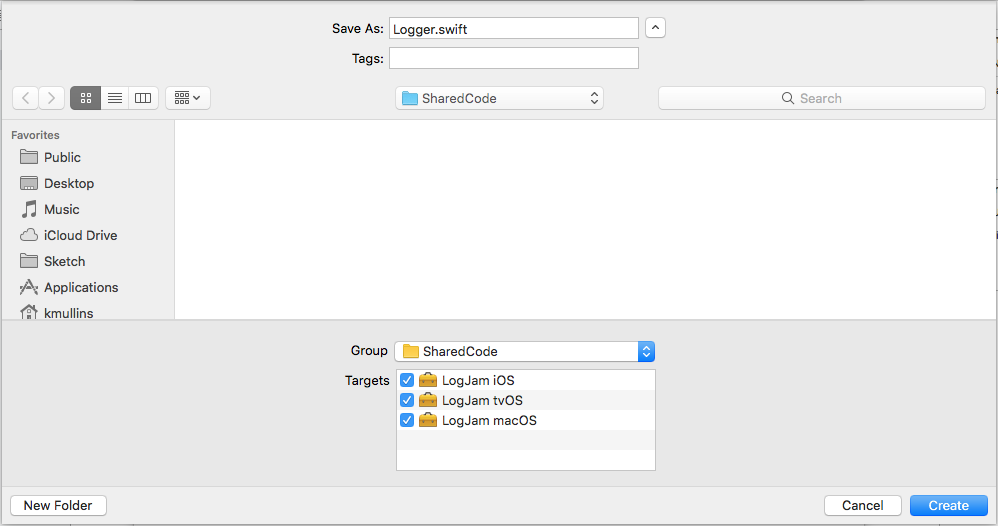
Click the Next button, set the Save As name to Logger.swift, ensure that the LogJam iOS, LogJam tvOS and LogJam macOS Targets are selected and click the Create button:
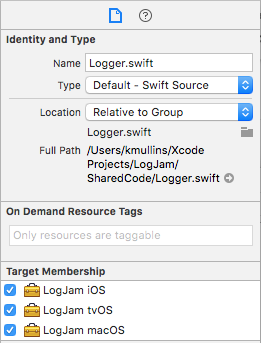
By selecting the LogJam iOS, LogJam tvOS and LogJam macOS Targets, the Logger.swift file will be compiled for all targets. If you need to change the targets later, select the file in the Project Navigator and set the Target Membership under the File Inspector:
Adding API Documentation Comments
Next, we’ll add the following code to the Logger.swift file and decorate it with comments for our API documentation:
//
// Logger.swift
// LogJam
//
// Created by Kevin Mullins on 3/21/18.
//
import Foundation
/**
Records the given message in the system log.
```swift
import LogJam
...
Logger.record("Log this message")
```
*/
public class Logger {
/**
Records the given message in the system log.
```swift
import LogJam
...
Logger.record("Log this message")
```
- Parameter text: The message to record.
*/
public static func record(_ text: String) {
print(text)
}
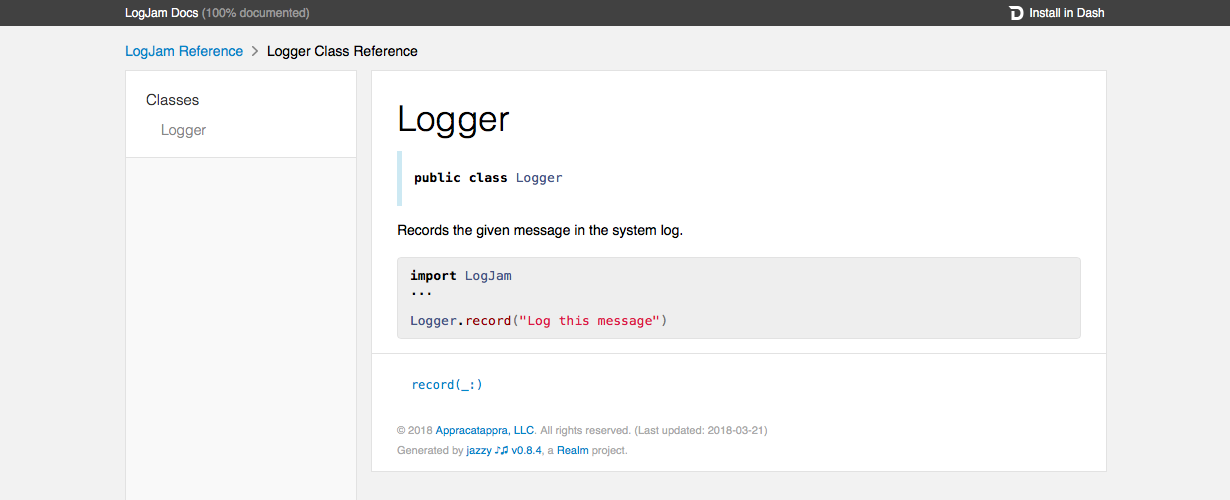
}APPCODA has an excellent article on Documenting Your Swift Code in Xcode Using Markdown so I won’t reproduce that work here. With these comments in place, a developer consuming this framework can get Quick Help on any feature by ALT-Clicking on a function:
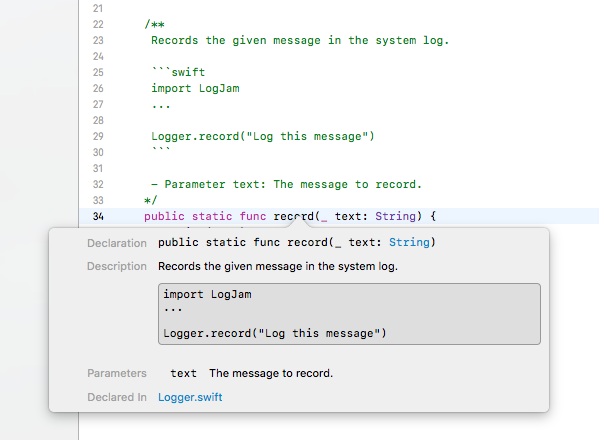
Latter, we will be using Realm’s Jazzy to generate professional looking API documentation from these comments.
Adding Platform Specific Code
There are two main mechanisms for adding platform-specific code to your framework projects: 1) by including code in #if...#endif compiler instructions, 2) by adding a new file and selecting a specific Target Membership (as show above).
Using #if…#endif
For simple changes, you can add #if os(target)...#endif compiler instructions to specify your platform specific code where target is one of the following:
iOSwatchOStvOSmacOS
For example:
/// Returns `true` if the app is running in Apple CarPlay, else returns `false`.
public static var isCar: Bool {
    #if os(watchOS) || os(macOS)
        return false
    #else
        return UIDevice.current.userInterfaceIdiom == .carPlay
    #endif
}
Again, I don’t suggest this for large sections of code or for multiple, overlapping sections because it can make the code difficult to read and maintain.
Using Specific Target Membership Files
For large, complex changes create a new file under the specific Target group in the Project Navigator. Take the example of our macOS specific code in our Action Utilities framework:
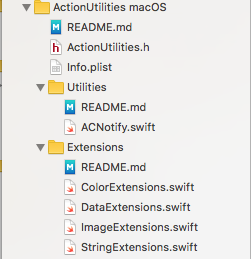
The ColorExtension.swift file holds all of the macOS specific code and the file belongs to the ActionUtilities macOS Target Membership:
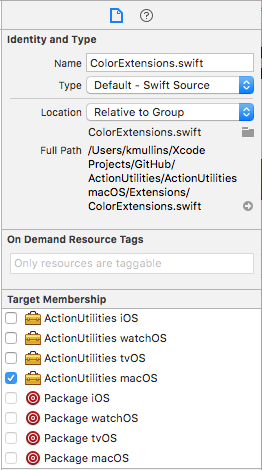
This isolates the macOS in a single file making it easier to read and maintain. From here you can either have the full code of the require piece or use Extensions (extension) to add OS specific functionality.
Packaging the Universal Framework
To this point, we have added the targets and code to build and test our framework for all of the supported Apple OSes and set the groundwork for building our API documentation.
When we have the framework ready to ship, we will need a way to build a Universal Framework that will work on both real hardware and the simulators (for iOS, tvOS and watchOS), a way to create both trial and release version (if selling the framework) and a way to create our final API documentation.
The information for this section came from the Build a Universal Framework for iOS using Swift article.
Adding an iOS Package
The first thing we need to do when creating a package is to compile both an iOS Simulator version of the framework and a iOS hardware version and combine them together using the lipo command.
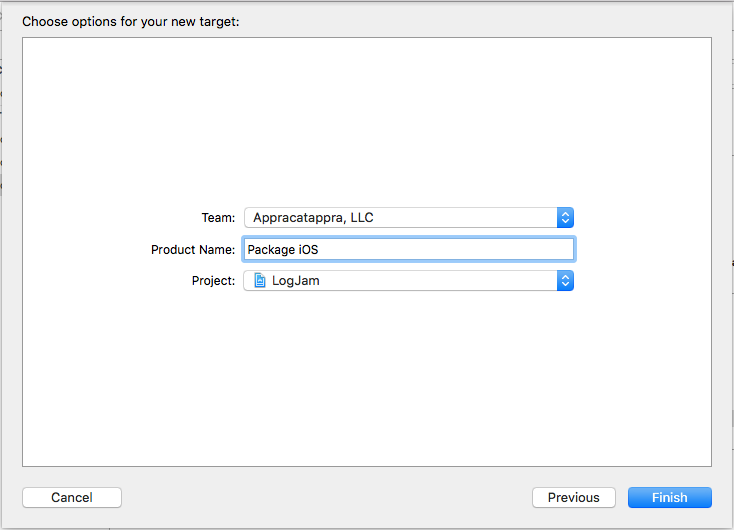
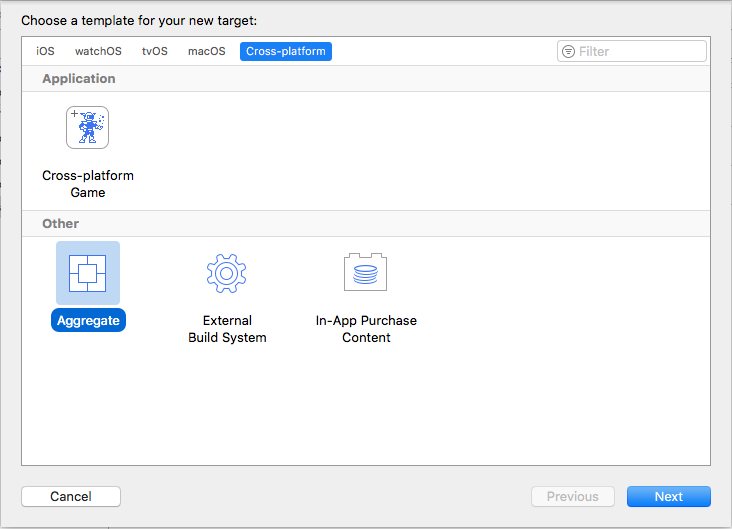
Select the project from the Project Navigator and add a new Target. Select Cross-platform > Aggregate and click Next:

Enter Package iOS for the Product Name and click Finish:
Creating the Universal iOS Library
We will need to use a Shell Script to compile the two different version of the framework and combine them into one. The script I use is a heavily modified version from the Build a Universal Framework for iOS using Swift article that support making a trail or release version as well.
With the Package iOS target selected, go to the Build Phases tab, click the + button at the top to add a new phase and select New Run Script Phase. Double-click the new phases section tile and rename it Make Universal Library:
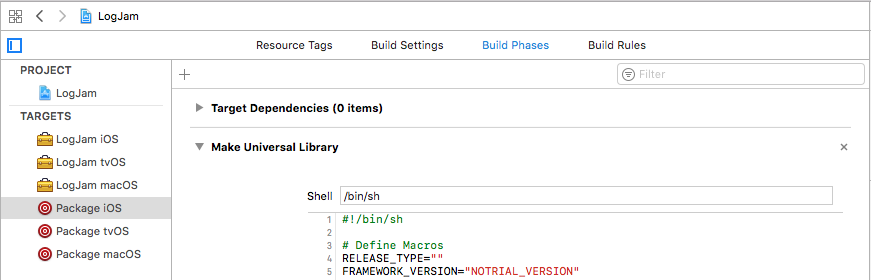
Next, add the following script:
#!/bin/sh

# Step 1: Define Macros
RELEASE_TYPE=""
FRAMEWORK_VERSION="NOTRIAL_VERSION"

# Step 2: Define OS and directories
UNIVERSAL_TARGET="iOS"
UNIVERSAL_OUTPUTFOLDER=${BUILD_DIR}/${CONFIGURATION}-universal-${UNIVERSAL_TARGET}
UNIVERSAL_FRAMEWORKFOLDER=${PROJECT_NAME}${RELEASE_TYPE}/${UNIVERSAL_TARGET}
DEVICE_OS="iphoneos"
DEVICE_SIMULATOR="iphonesimulator"

# Step 3: Make sure the output directories exists
mkdir -p "${UNIVERSAL_OUTPUTFOLDER}"
mkdir -p "${UNIVERSAL_FRAMEWORKFOLDER}"

# Step 4: Build Device and Simulator versions
# See: https://developer.apple.com/legacy/library/documentation/Darwin/Reference/ManPages/man1/xcodebuild.1.html
xcodebuild -target "${PROJECT_NAME} ${UNIVERSAL_TARGET}" ONLY_ACTIVE_ARCH=NO -configuration ${CONFIGURATION} -sdk ${DEVICE_OS}  BUILD_DIR="${BUILD_DIR}" BUILD_ROOT="${BUILD_ROOT}" OTHER_SWIFT_FLAGS="-D ${FRAMEWORK_VERSION}" clean build
xcodebuild -target "${PROJECT_NAME} ${UNIVERSAL_TARGET}" VALID_ARCHS="x86_64 i386" -configuration ${CONFIGURATION} -sdk ${DEVICE_SIMULATOR} ONLY_ACTIVE_ARCH=NO BUILD_DIR="${BUILD_DIR}" BUILD_ROOT="${BUILD_ROOT}" OTHER_SWIFT_FLAGS="-D ${FRAMEWORK_VERSION}" clean build

# Step 5: Copy the framework structure (from iphoneos build) to the universal folder
cp -R "${BUILD_DIR}/${CONFIGURATION}-${DEVICE_OS}/${PROJECT_NAME}.framework" "${UNIVERSAL_OUTPUTFOLDER}/"

# Step 6: Copy Swift modules from iphonesimulator build (if it exists) to the copied framework directory
SIMULATOR_SWIFT_MODULES_DIR="${BUILD_DIR}/${CONFIGURATION}-${DEVICE_SIMULATOR}/${PROJECT_NAME}.framework/Modules/${PROJECT_NAME}.swiftmodule/."
if [ -d "${SIMULATOR_SWIFT_MODULES_DIR}" ]; then
cp -R "${SIMULATOR_SWIFT_MODULES_DIR}" "${UNIVERSAL_OUTPUTFOLDER}/${PROJECT_NAME}.framework/Modules/${PROJECT_NAME}.swiftmodule"
fi

# Step 7: Create universal binary file using lipo and place the combined executable in the copied framework directory
lipo -create -output "${UNIVERSAL_OUTPUTFOLDER}/${PROJECT_NAME}.framework/${PROJECT_NAME}" "${BUILD_DIR}/${CONFIGURATION}-${DEVICE_SIMULATOR}/${PROJECT_NAME}.framework/${PROJECT_NAME}" "${BUILD_DIR}/${CONFIGURATION}-${DEVICE_OS}/${PROJECT_NAME}.framework/${PROJECT_NAME}"

# Step 8: Convenience step to copy the framework to the project's directory
cp -R "${UNIVERSAL_OUTPUTFOLDER}/${PROJECT_NAME}.framework" "${UNIVERSAL_FRAMEWORKFOLDER}/"

# Step 9: Convenience step to open the project's directory in Finder
# open "${UNIVERSAL_FRAMEWORKFOLDER}/"

# Step 10: Testing
# open "${UNIVERSAL_OUTPUTFOLDER}"
Let’s break down what’s going on here.
Step 1: Define Macros
The first two variables are to support trial verses release version of the framework. For us, we use the following for release versions:
# Step 1: Define Macros
RELEASE_TYPE=""
FRAMEWORK_VERSION="NOTRIAL_VERSION"
And this version for trials:
# Step 1: Define Macros
RELEASE_TYPE="Trial"
FRAMEWORK_VERSION="TRIAL_VERSION"
RELEASE_TYPE is added to the name of the folder that gets built containing the final build versions of the framework (one for each OS). FRAMEWORK_VERSION is passed as a macro definition during compilation that can be tested for using the following code:
#if TRIAL_VERSION
    ACNotify.showMessage(text: "Appracatappra ADSQLParser Trial")
#endif
Step 2: Define OS and directories
UNIVERSAL_TARGET is the human readable name of the sub folder that will be built and must match the prefix we added to each of the project Targets. UNIVERSAL_OUTPUTFOLDER is the name of the temporary folder that will hold the Universal Framework as it is being built. UNIVERSAL_FRAMEWORKFOLDER is the name of the folder that the completed framework will be copied to. DEVICE_OS and DEVICE_SIMULATOR define the hardware and simulator that the framework is being built for as:
- iOS –
iphoneosandiphonesimulator. - watchOS –
watchosandwatchsimulator. - tvOS –
appletvosandappletvsimulator. - macOS –
macosx, macOS does not use theDEVICE_SIMULATORsetting.
Step 3: Make sure the output directories exists
Ensures that the required folders have been built.
# Step 4: Build Device and Simulator versions
Creates the required hardware and simulator versions for the specific project Target with the given prefix (${PROJECT_NAME} ${UNIVERSAL_TARGET}). For example LogJam iOS for our current project and OS.
Step 5: Copy the framework structure from iphoneos build
Copies the results of the iOS hardware specific framework to our temporary build directory.
Step 6: Copy the framework structure from iphonesimulator build
Copies the results of the iOS Simulator specific framework to our temporary build directory.
Step 7: Create universal binary file
Uses the lipo command to combine the hardware and simulator versions of the framework into one, Universal Framework.
# Step 8: Copy the framework
Copies the resulting framework into the UNIVERSAL_FRAMEWORKFOLDER framework directory specified above.
Steps 9 and 10
Can be used for convenience and testing to open the UNIVERSAL_OUTPUTFOLDER and UNIVERSAL_FRAMEWORKFOLDER framework directories specified above after the build completes.
Creating the iOS API Documentation
Click the + button at the top to add a new phase and select New Run Script Phase. Double-click the new phases section tile and rename it Build API Documentation:

Add the following script:
#!/bin/sh

# Define macros
API_TARGET="iOS"
API_OUTPUT="${PROJECT_DIR}/API/${API_TARGET}"
DEVICE_OS="iphoneos"
ROOT_URL="https://appracatappra.com/api/actionutilities/ios/"

# Make sure the output directory exists
mkdir -p "${API_OUTPUT}"

# Move to project directory
cd "${PROJECT_DIR}"

# Create documentation with Jazzy
jazzy --output "${API_OUTPUT}" --sdk ${DEVICE_OS} --clean --xcodebuild-arguments -target,"${PROJECT_NAME} ${API_TARGET}" --module ${PROJECT_NAME} --author "Appracatappra, LLC" --root-url "${ROOT_URL}"

# Open project directory
# open "${API_OUTPUT}"
As stated in the Adding API Documentation Comments section above, this script will use Realm’s Jazzy to generate professional looking API documentation from MarkDown comments in the code. For example:
Adding a tvOS Package
Let’s repeat the steps to build the iOS Package above. Select the project from the Project Navigator and add a new Target. Select Cross-platform > Aggregate and click Next:
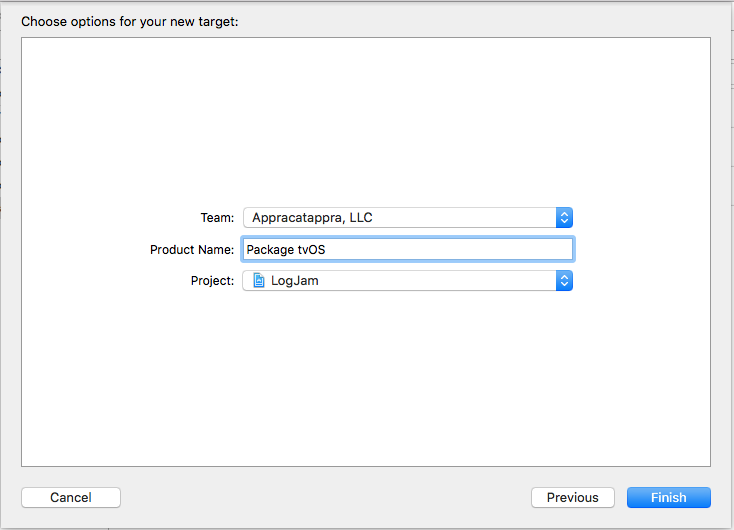
Enter Package tvOS for the Product Name and click Finish:
Creating the Universal tvOS Library
With the Package tvOS target selected, go to the Build Phases tab, click the + button at the top to add a new phase and select New Run Script Phase. Double-click the new phases section tile and rename it Make Universal Library. Next, add the following script:
#!/bin/sh

# Define Macros
RELEASE_TYPE=""
FRAMEWORK_VERSION="NOTRIAL_VERSION"

UNIVERSAL_TARGET="tvOS"
UNIVERSAL_OUTPUTFOLDER=${BUILD_DIR}/${CONFIGURATION}-universal-${UNIVERSAL_TARGET}
UNIVERSAL_FRAMEWORKFOLDER=${PROJECT_NAME}${RELEASE_TYPE}/${UNIVERSAL_TARGET}
DEVICE_OS="appletvos"
DEVICE_SIMULATOR="appletvsimulator"

# Make sure the output directories exists
mkdir -p "${UNIVERSAL_OUTPUTFOLDER}"
mkdir -p "${UNIVERSAL_FRAMEWORKFOLDER}"

# Step 1. Build Device and Simulator versions
# See: https://developer.apple.com/legacy/library/documentation/Darwin/Reference/ManPages/man1/xcodebuild.1.html
xcodebuild -target "${PROJECT_NAME} ${UNIVERSAL_TARGET}" ONLY_ACTIVE_ARCH=NO -configuration ${CONFIGURATION} -sdk ${DEVICE_OS}  BUILD_DIR="${BUILD_DIR}" BUILD_ROOT="${BUILD_ROOT}" OTHER_SWIFT_FLAGS="-D ${FRAMEWORK_VERSION}" clean build
xcodebuild -target "${PROJECT_NAME} ${UNIVERSAL_TARGET}" VALID_ARCHS="x86_64 i386" -configuration ${CONFIGURATION} -sdk ${DEVICE_SIMULATOR} ONLY_ACTIVE_ARCH=NO BUILD_DIR="${BUILD_DIR}" BUILD_ROOT="${BUILD_ROOT}" OTHER_SWIFT_FLAGS="-D ${FRAMEWORK_VERSION}" clean build

# Step 2. Copy the framework structure (from iphoneos build) to the universal folder
cp -R "${BUILD_DIR}/${CONFIGURATION}-${DEVICE_OS}/${PROJECT_NAME}.framework" "${UNIVERSAL_OUTPUTFOLDER}/"

# Step 3. Copy Swift modules from iphonesimulator build (if it exists) to the copied framework directory
SIMULATOR_SWIFT_MODULES_DIR="${BUILD_DIR}/${CONFIGURATION}-${DEVICE_SIMULATOR}/${PROJECT_NAME}.framework/Modules/${PROJECT_NAME}.swiftmodule/."
if [ -d "${SIMULATOR_SWIFT_MODULES_DIR}" ]; then
cp -R "${SIMULATOR_SWIFT_MODULES_DIR}" "${UNIVERSAL_OUTPUTFOLDER}/${PROJECT_NAME}.framework/Modules/${PROJECT_NAME}.swiftmodule"
fi

# Step 4. Create universal binary file using lipo and place the combined executable in the copied framework directory
lipo -create -output "${UNIVERSAL_OUTPUTFOLDER}/${PROJECT_NAME}.framework/${PROJECT_NAME}" "${BUILD_DIR}/${CONFIGURATION}-${DEVICE_SIMULATOR}/${PROJECT_NAME}.framework/${PROJECT_NAME}" "${BUILD_DIR}/${CONFIGURATION}-${DEVICE_OS}/${PROJECT_NAME}.framework/${PROJECT_NAME}"

# Step 5. Convenience step to copy the framework to the project's directory
cp -R "${UNIVERSAL_OUTPUTFOLDER}/${PROJECT_NAME}.framework" "${UNIVERSAL_FRAMEWORKFOLDER}/"

# Step 6. Convenience step to open the project's directory in Finder
# open "${UNIVERSAL_FRAMEWORKFOLDER}/"

# KKM - Testing
# open "${UNIVERSAL_OUTPUTFOLDER}"
See the Creating the Universal iOS Library section above for the full details of what is going on here.
Creating the tvOS API Documentation
Click the + button at the top to add a new phase and select New Run Script Phase. Double-click the new phases section tile and rename it Build API Documentation. Add the following script:
#!/bin/sh

# Define macros
API_TARGET="tvOS"
API_OUTPUT="${PROJECT_DIR}/API/${API_TARGET}"
DEVICE_OS="appletvos"
ROOT_URL="https://appracatappra.com/api/actiondata/tvos/"

# Make sure the output directory exists
mkdir -p "${API_OUTPUT}"

# Move to project directory
cd "${PROJECT_DIR}"

# Create documentation with Jazzy
jazzy --output "${API_OUTPUT}" --sdk ${DEVICE_OS} --clean --xcodebuild-arguments -target,"${PROJECT_NAME} ${API_TARGET}" --module ${PROJECT_NAME} --author "Appracatappra, LLC" --root-url "${ROOT_URL}"

# Open project directory
# open "${API_OUTPUT}"
See the Creating the iOS API Documentation section above for the full details of what is going on here.
Adding a macOS Package
Again, select the project from the Project Navigator and add a new Target. Select Cross-platform > Aggregate and click Next:

Enter Package macOS for the Product Name and click Finish:
Creating the macOS Library
With the Package macOS target selected, go to the Build Phases tab, click the + button at the top to add a new phase and select New Run Script Phase. Double-click the new phases section tile and rename it Make Universal Library. Next, add the following script:
#!/bin/sh

# Define Macros
RELEASE_TYPE=""
FRAMEWORK_VERSION="NOTRIAL_VERSION"

UNIVERSAL_TARGET="macOS"
DEVICE_OS="macosx"
UNIVERSAL_FRAMEWORKFOLDER=${PROJECT_NAME}${RELEASE_TYPE}/${UNIVERSAL_TARGET}

# Make sure the output directories exists
mkdir -p "${UNIVERSAL_FRAMEWORKFOLDER}"

# Step 1. Build Device and Simulator versions
# See: https://developer.apple.com/legacy/library/documentation/Darwin/Reference/ManPages/man1/xcodebuild.1.html
xcodebuild -target "${PROJECT_NAME} ${UNIVERSAL_TARGET}" ONLY_ACTIVE_ARCH=NO -configuration ${CONFIGURATION} -sdk ${DEVICE_OS}  BUILD_DIR="${BUILD_DIR}" BUILD_ROOT="${BUILD_ROOT}" OTHER_SWIFT_FLAGS="-D ${FRAMEWORK_VERSION}" clean build


# Step 2. Copy the framework structure (from iphoneos build) to the universal folder
cp -R "${BUILD_DIR}/${CONFIGURATION}/${PROJECT_NAME}.framework" "${UNIVERSAL_FRAMEWORKFOLDER}/"

# Step 3. Convenience step to open the project's directory in Finder
# open "${UNIVERSAL_FRAMEWORKFOLDER}/"
See the Creating the Universal iOS Library section above for the full details of what is going on here.
Creating the macOS API Documentation
Click the + button at the top to add a new phase and select New Run Script Phase. Double-click the new phases section tile and rename it Build API Documentation. Add the following script:
#!/bin/sh

# Define macros
API_TARGET="macOS"
API_OUTPUT="${PROJECT_DIR}/API/${API_TARGET}"
DEVICE_OS="macosx"
ROOT_URL="https://appracatappra.com/api/actiondata/macos/"

# Make sure the output directory exists
mkdir -p "${API_OUTPUT}"

# Move to project directory
cd "${PROJECT_DIR}"

# Create documentation with Jazzy
jazzy --output "${API_OUTPUT}" --sdk ${DEVICE_OS} --clean --xcodebuild-arguments -target,"${PROJECT_NAME} ${API_TARGET}" --module ${PROJECT_NAME} --author "Appracatappra, LLC" --root-url "${ROOT_URL}"

# Open project directory
# open "${API_OUTPUT}"
See the Creating the iOS API Documentation section above for the full details of what is going on here.
Setting the Packages to Build the Release Version of the Framework
The final step is to set all of the Packages to build for Release instead of Debug mode. Click on the Action Scheme at the top of Xcode and select Manage Schemes…:
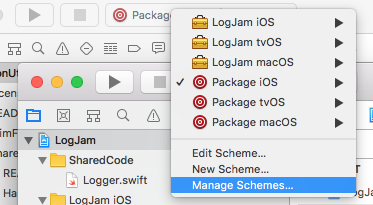
Select Package iOS and click the Edit button:
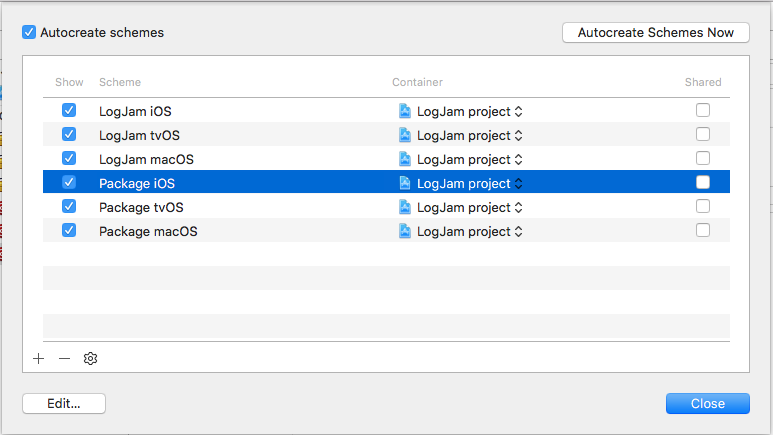
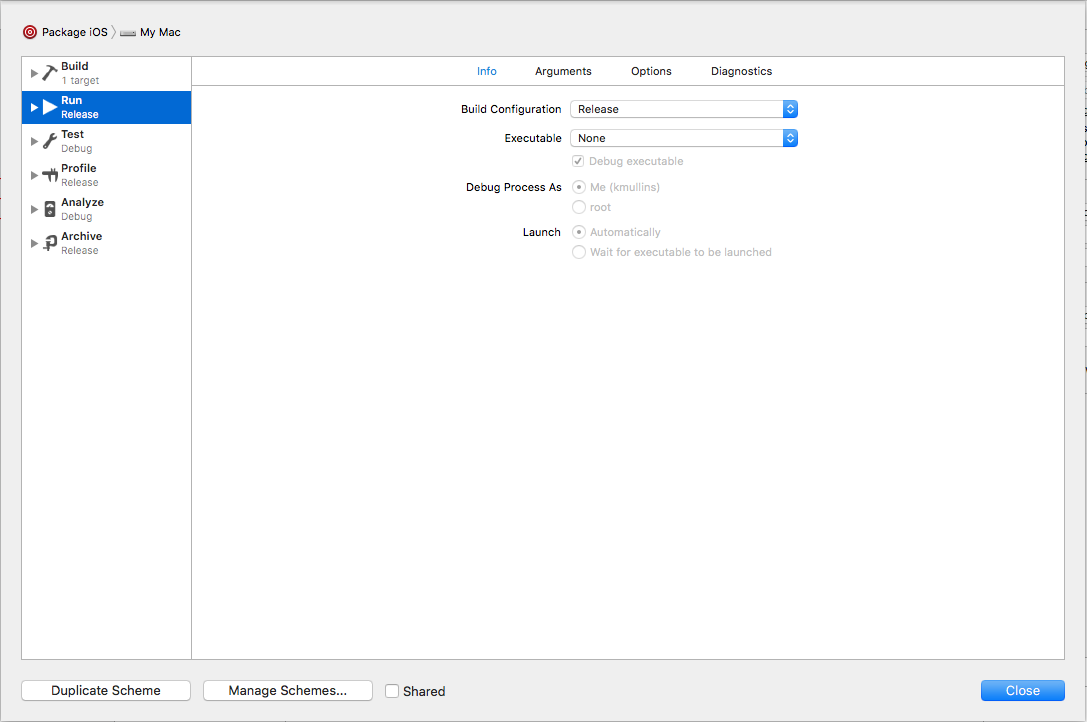
Set the Build Configuration to Release and click the Manage Schemes… button:
Select Package tvOS and click the Edit button:
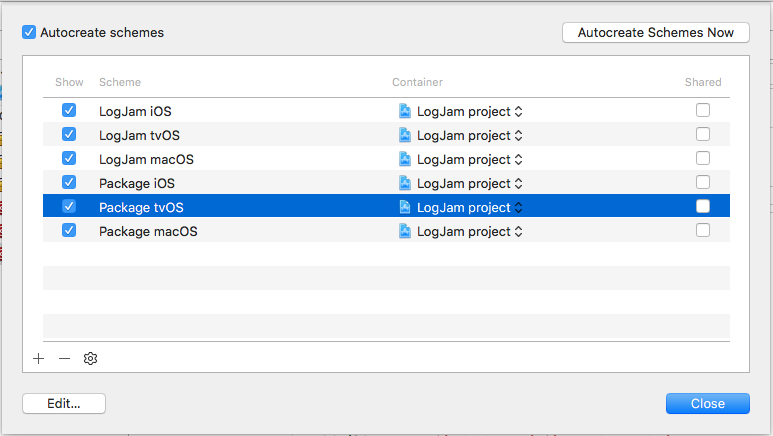
Set the Build Configuration to Release and click the Manage Schemes… button:

Select Package macOS and click the Edit button:
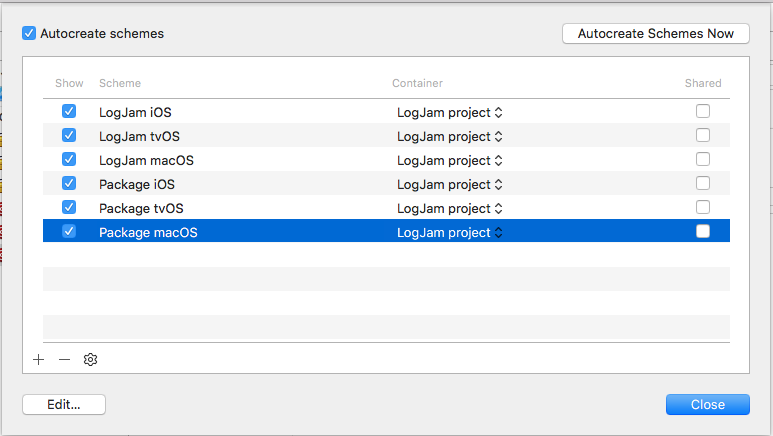
Set the Build Configuration to Release and click the Close button:

Up Next
The second part, Cross-Platform Universal Swift Framework Installers, covers creating an Installer Package from our compiled Universal Frameworks that includes all of the Apple OSes that the framework supports and placing them in the correct locations in the consumer’s development computer.
The third part, Using Your Custom Cross-Platform Universal Swift Framework, covers installing and using our custom cross-platform Universal Swift Framework on a consumer’s development computer, updating to new framework version and trimming the “fat binary” framework to release the app to the iTunes App Store.
I’ve open sourced the LogJam project so you can access the final project if you like.