

This second part of our three part series on creating Universal Frameworks with the Swift Package Manager covers the steps Appracatappra uses to build Swift Packages that support sharing common code across Swift Projects and Apple OSes.
In the first part, Building Cross-Platform Universal Frameworks using Swift & the Swift Package Manager, we covered the steps required to create a new Swift Package, set the OSes that the Framework will run on, added the code & tests for the Framework and ensured that the Framework built on every OS supported.
In this section, we will cover the steps required to properly document your Swift Package so any developer using your Framework knows how to properly implement it.
Part two contains the following sections:
- Why Should I Provide Documentation?
- What types of Documentation is Required?
- Good Read Me Documentation
- Providing Markup Code Comments
- Generating API Documentation
- Installing Jazzy
- The BuildApiDocs Shell Script
- Prepare the BuildApiDocs Shell Script to Run
- Running the BuildApiDocs Shell Script
- Viewing the API Documentation
- Up Next
As I stated in the first part of the series, I found much of the information for this article scattered throughout the internet, so another point of this article is to pull it all together in one place. I’ll give credit and link back to the original source articles, so you can look at different ways of structuring your projects to fit your own needs.
Why Should I Provide Documentation?
Good documentation for any Framework is critical not only for other developers consuming your library, but for any developer that needs to maintain the Framework in the future… including the initial developer, you.
I don’t know how many times I’ve had to maintain a piece of code that I have written months, or years, earlier and wondered why I had coded something a specific way. Additionally, I’ve had to use a Framework I had written some time ago and had to rely on my comments and documentation to correctly implement it.
While Self-Documenting Code helps another developer be able to understand, use and maintain your Framework, clean, well thought out Code Comments and additional documentation (such as the README.md file) are an absolutely necessity.
What types of Documentation is Required?
At the very least, you should be including a good README.md file in Markdown that defines the following:
- What the Framework does.
- What OSes the Framework supports.
- How to consume the Framework in a project.
- A few examples of using the Framework.
Additionally, you should provide Code Comments for every public element that the Framework exposes. Using either Jazzy or Apple’s DocC tools, you’ll want to convert these comments into API Documentation that any consuming developer can reference to properly implement your Framework in one of their projects.
For very complex Frameworks, with lot’s of moving parts, you might want to include additional Read Me style documents in Markdown, that cover specific functionality in detail. As we have done here for our SwiftletUtilities package:
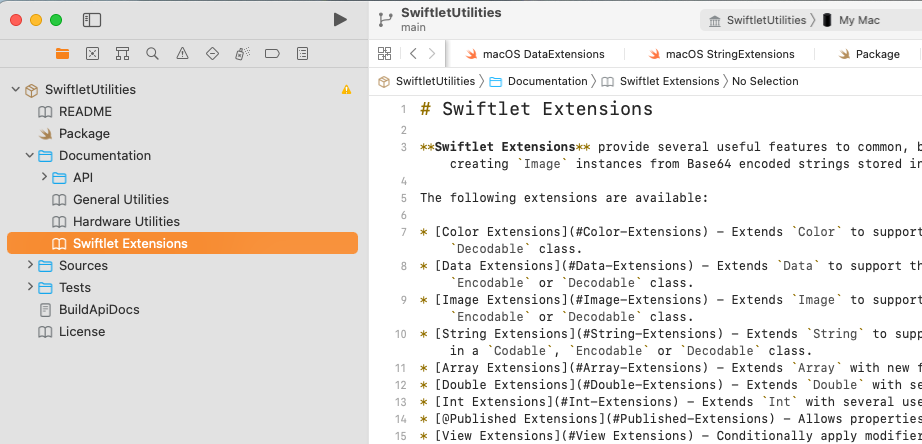
Where we’ve added further, detailed documentation for General Utilities, Hardware Utilities and Swiftlet Extensions.
Remember, you have intimate knowledge of why you created a Framework a certain way and how to use the Framework in another project, that another developer will not have. As a rule of thumb, just because it makes sense to you doesn’t mean it will make sense to someone else.
This is where good documentation comes in and why it is critical.
Good Read Me Documentation
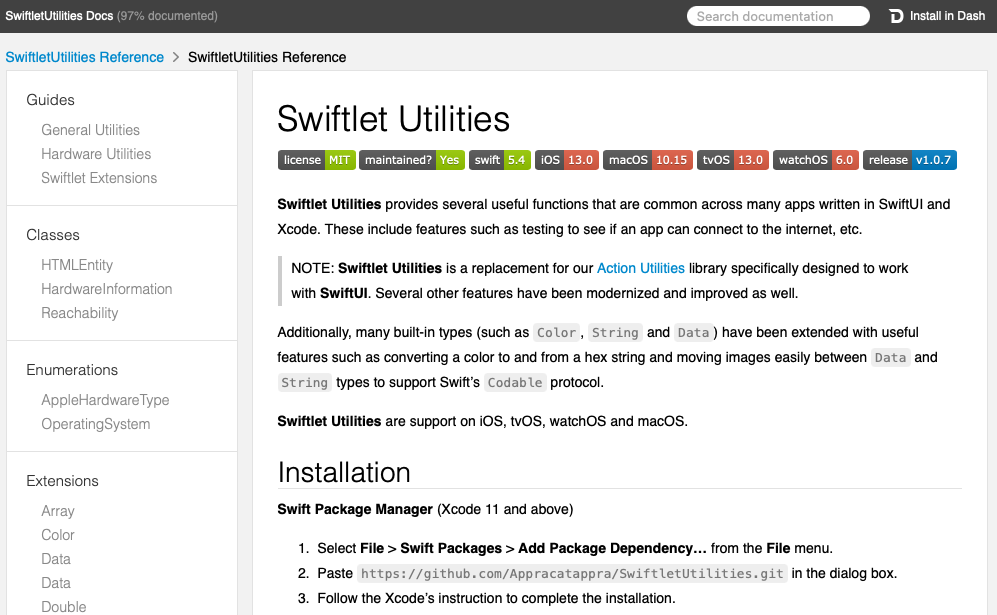
As I stated above, a good Read Me file is critical because it’s the first exposure that a potential user of your Framework has. It should cleanly and quickly tell a developer what your Framework does, what OSes it supports and how to consume it.
As an example, here’s the README.md file from our CircularProgressGauge package:
# CircularProgressGauge for Swift and SwiftUI
       
**CircularProgressGauge** uses SwiftUI to display a circular gauge showing the percent complete (0% to 100%) for a process. **CircularProgressGauge** is completely user styleable with control over the following elements:
* **Gradient** - Defines the color that will be used to fill the gauge.
* **Track Color** - The color for the empty part of the gauge.
* **Font Color** - The color for the percent completed text.
* **Font Size** - The size of the percent completed text.
<a name="Installation"></a>
## Installation
**Swift Package Manager** (Xcode 11 and above)
1. Select **File** > **Swift Packages** > **Add Package Dependency…** from the **File** menu.
2. Paste `https://github.com/Appracatappra/CircularProgressGauge.git` in the dialog box.
3. Follow the Xcode's instruction to complete the installation.
> Why not CocoaPods, or Carthage, or blank?
Supporting multiple dependency managers makes maintaining a library exponentially more complicated and time consuming.
Since, the **Swift Package Manager** is integrated with Xcode 11 (and greater), it's the easiest choice to support going further.
## Using CircularProgressGauge
**CircularProgressGauge** is very easy to use inside a SwiftUI `View`:
```swift
@State var progress = 0.5
var body: some View {
VStack {
// Progress is give as 0.0 to 1.0
CircularProgressGauge(progress: $progress)
.frame(width: 40.0, height: 40.0)
}
}
}
```
Would present the following gauge on iOS:

This documentation can be broken down into the following sections:
- Title – A clear cut title for the Framework.
- Badges – A series of Shields.io badges that quickly relay to the developer what version of Swift the Framework supports and what OSes and versions are supported.
- Short Description – A short, clear description that describes what the Framework does and why a developer would want to use your Framework.
- Installation – Instructions on how to include the Framework in a Swift Project.
- An Example – A quick, simple example of calling the Framework.
Including Images in your Documentation
If you want to include images in your README.md file (or any other documentation). I suggest including an Images directory in the Documentation folder and placing all of your images there. For example:
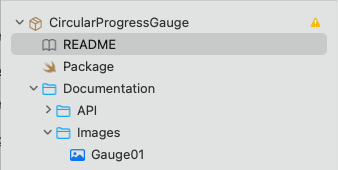
Which can be referenced in your Markdown files as:
Providing Markup Code Comments
For every member that your Framework exposes, you should be providing Markup Code Comments that we will be converting into API Documentation later.
For example, here is the main comment for our CircularProgressGauge package:
/**
 Defines a SwiftUI Circular Progress Gause that will show the percent complete (0% to 100%) for a process.

 ## Example:
 ```swift
 @State var progress = 0.5

 var body: some View {
    VStack {
        // Progress is give as 0.0 to 1.0
         CircularProgressGauge(progress: $progress)
             .frame(width: 40.0, height: 40.0)
         }
    }
 }
 ```
 - Remark: Progress is given to the control as a number between 0.0 to 1.0 which will render as a 0% to 100%.
 */
This comment provides a short description, an example call and general remarks about calling the function. Here is another function that also includes documentation for the parameters the function takes:
/// Creates a new instance of the gauge.
    /// - Parameters:
    ///   - progress: The amount of progress as a number between 0.0 to 1.0.
    ///   - gradient: The gradient used to fill the gauge from 0% to 100%.
    ///   - trackColor: The track (the empty part of the gauge) color.
    ///   - fontColor: The color of the font used to display the percent complete.
    ///   - fontSize: The size of the font used to display the percent complete.
    ///   - trackWidth: The width of the Track and gauge display line.
    ///   - systemImage: If not empty (""), display the named SF Font  image given in the center of the gauge instead of the percentage complete. The image will be rendered in the `fontColor` and at the `fontSize`.
    ///   - isAnimated: If `true`, the gauge will animate when it's value changes,. If false the gauge will change value without animating the change.
    public init(progress:Binding<Float>, gradient:Gradient = Gradient(colors: [.red, .orange, .yellow, .green]), trackColor:Color = Color.systemGray6, fontColor:Color = Color.black, fontSize:Int = 12, trackWidth:Double = 5.0, systemImage:String = "", isAnimated:Bool = true) {
    ...
}
PRO TIP: If you place your cursor on or just above any non commented member in Xcode and select the Editor > Structure > Add Documentation menu item (or use the Keyboard Shortcut: Option-Command-/), Xcode will automatically add a template for the member will all of the elements ready for you to fill out.
See Apple’s Markup Formatting Reference for more details on creating this type of documentation.
Additionally, I’d suggest reading APPCODA’s excellent Documenting Your Swift Code in Xcode Using Markdown article. They’ve done a great describing the how’s and why’s so I’m not going to recreate it here.
Generating API Documentation
As of the writing of this article, there are two options for generating API Documentation from your Markup Code Comments:
- Jazzy – Jazzy is a command-line utility that generates documentation for Swift or Objective-C created by Realm.
- DocC – Apple’s new DocC tool that Apple describes as “The DocC documentation compiler available in Xcode 13 and later converts Markdown-based text into rich documentation for Swift frameworks and packages, and displays it right in the Xcode documentation window. You can also host this documentation on a website.”.
Currently, DocC is in Beta and has a few quirks when being used to document a Framework. As a result, we are still relying on Jazzy and that’s what I’ll be covering in the rest of this document.
As DocC matures, I’ll update this article to reflect using DocC instead of Jazzy.
Installing Jazzy
You’ll need to install the Jazzy tooling before you continue. Again, I’d suggest reading APPCODA’s excellent Documenting Your Swift Code in Xcode Using Markdown article. They have a detail description of doing the install.
That said, the simple steps are:
- Open the Terminal app.
- Enter:
[sudo] gem install jazzy - Enter your password.
- Wait for the install to complete.
NOTE: It can take awhile for the install to kickoff and finish, so be patient. You’ll get feedback when the install finishes.
The BuildApiDocs Shell Script
To make it easier to initially generate the API Documentation and to recreate it whenever the Framework has been updated, I add a standardized BuildApiDocs.sh file to all of my Frameworks.
As an example, here’s the BuildApiDocs.sh file from our SwiftletUtilities package:
#!/bin/sh

# Do the following to make executable and run this script
# chmod +x BuildApiDocs.sh
# sh BuildApiDocs.sh

# Define macros
PROJECT_NAME="SwiftletUtilities"
API_OUTPUT="Documentation/API/"
ROOT_URL="https://appracatappra.com/api/"

# Make sure the output directory exists
mkdir -p "${API_OUTPUT}"

# Move to project directory
#cd "${PROJECT_DIR}"

# Create documentation with Jazzy
jazzy --output "${API_OUTPUT}" --clean --swift-build-tool spm --build-tool-arguments -Xswiftc,-swift-version,-Xswiftc,5 --module ${PROJECT_NAME} --author "Appracatappra, LLC" --root-url "${ROOT_URL}" --documentation=Documentation/*.md

# Open project directory
# open "${API_OUTPUT}"
For any new project I add this script to there are three macros that need to be adjusted:
- PROJECT_NAME – This is the name of the Framework.
- API_OUTPUT – This is where the documentation will be generated. I typically keep this the same.
- ROOT_URL – If I’m going to host the resulting API Documentation on my website, this defines the root URL so all of the embedded page links will continue to work.
Prepare the BuildApiDocs Shell Script to Run
Before the BuildApiDocs.sh file can be run for the first time, you’ll need to make the file executable. Do the following:
- Open the Terminal app.
- Move to the directory where the
BuildApiDocs.shfile is located using theCDcommand. - Enter:
chmod +x BuildApiDocs.sh
Running the BuildApiDocs Shell Script
To run the BuildApiDocs.sh file and generate the API Documentation do the following:
- Open the Terminal app.
- Move to the directory where the
BuildApiDocs.shfile is located using theCDcommand. - Enter:
sh BuildApiDocs.sh
In a few minutes, Jazzy will start providing information about the steps it is taking to generate the documentation and you’ll be notified when the documentation in completed.
Viewing the API Documentation
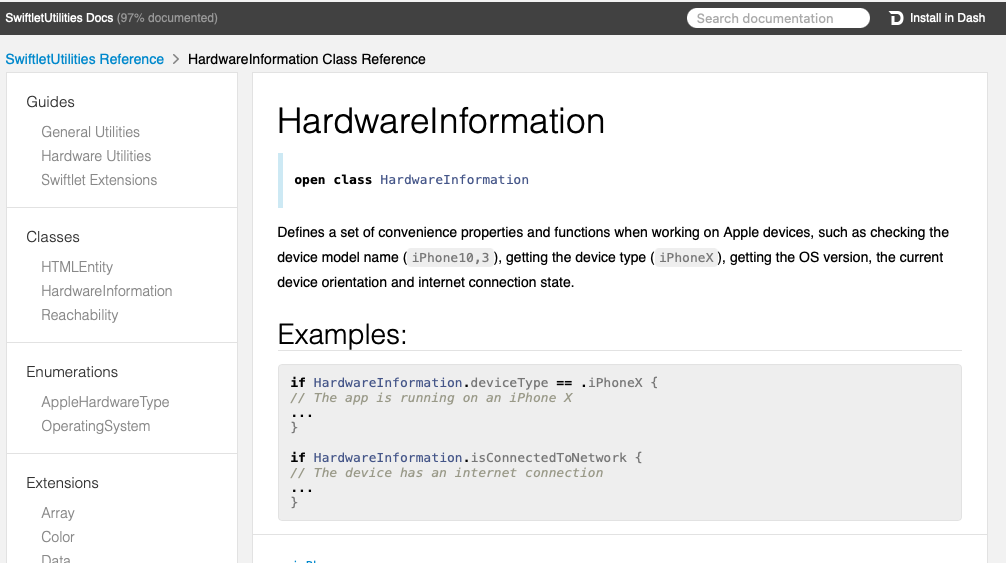
After Jazzy has finished building your API Documentation, you can navigate to the Documentation > API folder inside of you Framework’s Project Folder and double-click the index.html file to open it in your web browser:
Selecting any member item will show details like the following:
Support
If you find this useful, please consider making a small donation:

It’s through the support of contributors like yourself, I can continue to create useful articles like this one and continue build, release and maintain high-quality, well documented Swift Packages for free.
Up Next
The third and final part of the series, Releasing and Versioning Your Swift Package, will cover to step to release your Swift Package on GitHub and how to set and maintain the version of the Framework.